Tips for Photographing Waterfalls

From trickles of water to roaring flood-stage torrents, waterfalls are an ever-changing photographic subject. Their structure changes slowly over time, but the water falls differently every second. If one took 10 photographs in a row of the same waterfall, each would look different.

Below is an image taken of a small creek. This small area is isolated by using a telephoto lens, then cropping top/bottom of the image, to create an expansive feeling to the photograph. The motion of the water is in-focus. To accomplish this, the shutter speed needs to be at 1/60 second or faster. It is dependent on the speed the water is flowing. With an image like this, it is best to use a tripod to stabilize the camera and be selective about composition. This was taken on a sunny day, and this portion of the creek was in the shade.

TIP – When using a tripod, remember to turn-off the image stabilization on the lens.

copyright Karen Ulvestad
This is a small portion of a stream cascading down and over rocks.

Waterfalls come in all shapes and sizes. What makes each unique is the way the water has sculpted the rocks surrounding it. The image above was a small section of a creek. The image below is much larger, and the first falls above a gorge that ends in a 50 +/- foot waterfall. This was a foggy and over-cast day in Mount Rainier National Park. The water in this image is not crisp, yet the rocks are sharp. To get this effect, the shutter speed needs to be 1/8 second or slightly slower. With these shutter speeds, the camera needs to be stabilized on a tripod or other method of stabilization. The aperture was F22, which created a larger depth of field, in comparison to the image above.

TIP – When a tripod is unavailable, try using a rock, tree or other object in the environment to stabilize the camera and/or one’s self.

copyright Karen Ulvestad
This waterfall was just above a small gorge that ended in a larger falls. It is in Mount Rainier National Park.

Time of year plays a part in capturing great waterfall images. The photos above were taken during the summer months. The image below was taken in the fall. The leaves have fallen from the trees, and offer a full view of the Whatcom Falls. The ground is covered with autumn colored leaves, adding color to the forest floor. This was taken on an over-cast day in October.

The “milking” effect of the waterfall is due to a slow shutter speed. In this case, it was 1/5 second, and a bridge rail was used for camera stabilization. This was shot with a wide-angle lens, and the aperture was F10.

copyright Karen Ulvestad
This was taken in the fall, and is a wide-angle shot of Lower Whatcom Falls.

This last image is Snoqualmie Falls at flood stage. The roads to the waterfall had been open a couple of hours earlier. It was flowing at 78,000 cubic feet of water per second, and it was incredibly loud. This was taken with slide film, and scanned to digital.

These locations are great to photograph waterfalls. It takes some planning to capture the photographic image one is seeking. The things to consider are weather, time of year, equipment, and accessibility to the location. In addition, it is good to factor in the costs associated with travel, food and/or lodging. For more tips and instruction, consider contacting me for workshop information.

Happy Shooting. . .Karen

copyright Karen Ulvestad
This is Snoqualmie Falls with 78,000 cubic feet of water per second. The road to the falls had opened earlier in the day.

Photographing Winter

Winter is a magical time to photograph the natural world. The world is changed with the white of snow or frost. Trees become dormant for the season, and visually become lines in the composition. The temperatures drop below freezing, and it is a different environment for operating a camera. Exposure changes to reflect white.

Below is a photograph of starlings in a tree covered with hoarfrost. The dark tone of the birds is in direct contrast to the white of the sky and tree limbs. For the frost to appear white, it is the time to over-expose the photograph. The dark tone of the birds will yield subtle colors and details. This image was shot at 100 ISO, 1/60 second shutter speed, and F8 aperture. I chose F8 to bring a larger depth of field to the image, yet knew sharpness didn’t matter for the background. The fog had not lifted too far from the ground, and was a mono-chromatic white.

copyright Karen Ulvestad

The reason that snow or white subjects need to be over-exposed is due to the nature of the camera’s light meter. The light meter reads the world as 18% gray, when it reads 0 (or the center of the meter). To compensate, the exposure needs to let more light into the camera, so the whites look white.

This second image has foreground, midground and background. I wanted to show the fore and mid ground in focus, and let the fog become the backdrop for the image. This photograph was shot at 200 ISO, 1/60 second shutter speed, and F10 aperture. It gave me the depth of field I was wanting to show in the image. The use of the tree branches at the top helps create a feeling of depth in the image, and help show the subject.

copyright Karen Ulvestad

This last image was a long-needle pine tree covered in hoarfrost. The ice crystals still maintained their crispness, and the cones were a nice contrast to the rest of the photo. I used a shallower depth of field to blur the background, and bring the viewer’s focus to the cones, needles and hoarfrost in the front of the image. The exposure for this one is 200 ISO, 1/60 second shutter speed, and F5.6 aperture.

Happy Shooting. . .Karen

copyright Karen Ulvestad

Learning Your Digital Camera can be Fun!

In the film world, photography was relatively simple for the photographer. We selected our film, shot our photos, developed the film (either ourselves or at a lab), edited the photos, and finished with a final product. We had a choice in film speed, and type of film. For creative affects, we had filters for our lenses, camera mounted flashes and other gadgets.

With digital photography, cameras are programmed with all this information. Film has become a media card (Compact Flash, SD, XD, etc.). Digital Photography is defined by processors and megapixels, instead film brand and speed. Instead of the photo lab developing our pictures, we have computer software (Photoshop, Lightroom, Elements, Picasso, Gimp and others). We can print our photos at home on our printers or send them to a photo lab.

So, where do we begin with our digital cameras?

copyright Karen Ulvestad
Kodak Slide Film scanned to a Digital file.

For some, the transition from Film to Digital is easy. For others, it is a struggle, and can be confusing. I’ve worked with all ages (children, teens, adults & seniors) and levels (beginning & intermediate) photographers with understanding the functions of their Digital cameras. Each person has a different way to learn the complex menus and functions of modern cameras, and need individual attention to learning the information.

The photo above was taken in 1997 with Kodak slide film and scanned to a digital file. It was taken at Arches National Park, and all the elements came together for a wonderful photograph. The photo below was taken in 2005 with a Canon 10D digital camera. It was taken at Arches National Park too. Both of these images were shot in Manual mode.

From the Digital Camera to the Digital Darkroom Intensive is a one day (6 hour) hands-on venture into camera operations and workflow for digital photography. I offer this class once a year at the Pacific Northwest Art School on Whidbey Island. Here is a link to their website and the class.

Join my workshop for a fun-filled day of learning Digital Photography and the Digital Darkroom. The last photo is John Day Fossil Beds, and was taken in 2012 with a Canon 5D Mark II.

Happy Shooting. . .Karen

copyright Karen Ulvestad
Canon 10D (6.3 megapixels)
copyright Karen Ulvestad
Canon 5D Mark II (21.3 megapixels)

Migratory Birds are at the Skagit Flats

Last Saturday, I spoke at the Historic Concrete Theatre with 30+ people. The presentation went well, and the participants left with a greater understanding of photographing birds. The Skagit Valley from Newhalem in the mountains to Puget Sound is filled with migratory birds this year.

The last of the Chum Salmon run is happening on the Skagit River, and the last eagle count was 121 between Sedro Woolley and Newhalem. The high count this year was around 250 eagles. This area holds the highest numbers of migratory bald eagles in the lower 48 states (US).

There is one last weekend of the Skagit Eagle Festival. This weekend is filled with events. Most are located in Concrete or Rockport, along Highway 20.

copyright Karen Ulvestad

The image above was taken this month in the Skagit Flats. These are Trumpeter Swans. This flock has both adult and immature birds. The adults are pure white, and the immature are gray. Currently, the swans are feeding between Highway 20, La Conner and west of the Skagit River. There are many flocks in the area, though not all are easy to photograph.

The Flats have more Bald Eagles this year. They are hunting Snow Geese and other migratory birds. The photo below is showing an eagle feeding on the remains of a Snow Goose. The geese seem to be in larger flocks this year. While we were watching this, two other eagles came in to feed. There was a conflict, though the light was too low to capture the interaction.

copyright Karen UlvestadThere is a visiting Snow Owl this year. This one (photo below) was resting on driftwood on the dike. There are several other birds on the Flats, including Short-earred Owl, Northern Harrier, Red-tailed Hawk and various migratory Sandpipers.

The presentation at the Skagit Eagle Festival went well. Here is a link to a short video clip of the photos used in the presentation http://www.youtube.com/watch?v=2sGSOvoIm2Q.

Happy Shooting. . .Karen

copyright Karen Ulvestad

Skagit Eagle Festival

The Skagit Eagle Festival takes place during the month of January. The event had many speakers, Native American events, float trips, and more. I will be speaking at the Concrete Theatre on January 19th from 12 pm to 1 pm, on photographing eagles and other wildlife.

This Festival comes at the peak of Bald Eagle migration to the Skagit River valley. The highest concentrations are from Concrete up to Marblemount along Highway 22. The photo at the end of this blog is from the Skagit Valley. Eagles congregate in the 100s.

copyright Karen Ulvestad

The photo above was taken on Fir Island. It is where the Skagit River comes into Puget Sound. The Skagit Flats are home to resident Bald Eagles, Northern Harriers, and other birds.

copyright Karen Ulvestad

During the winter, the Skagit Flats become home to thousands of migratory birds. These birds include Tundra Swans, Trumpeter Swans, Snow Geese, various species of Sand Pipers, Ducks, and more. Often, these birds can be seen from the road, and at the wildlife refuge areas.

For more information, comes see my presentation on January 19th, or follow my series on The Examiner.

Happy Shooting. . .Karen

copyright Karen Ulvestad


Stormy Weather Photography. . .

Late fall and winter weather is happening in the northern hemisphere, and it presents different photography challenges. The weather plays an important part at this time of the year. It is more likely to be windy, stormy, rainy, foggy or snowy at our outdoor destinations. The leaves have left the trees in many areas, giving fewer hiding places for wildlife and birds. The landscape takes on a different “feeling” than the warmer months of spring and summer. The colors change, and daylight hours are shorter.

During strong winds and stormy weather, birds seek refuge in sheltered areas. This image below was taken during strong winds. This great blue heron is sheltered from the winds by the marsh grasses, and is feeding in the shallow water. In this image, he is cleaning his feet. There were several great blue heron roosting in the tall grass behind this bird. The weather brought these birds closer to the walk-way through the marsh, and made them easier to photograph. Other birds finding shelter in the marsh were Northern Shovelers (ducks) and Killdeer. Small song birds were feeding in the cattails and trees.

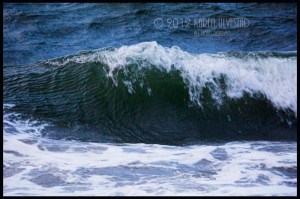
copyright Karen UlvestadThe beach is a wonderful location during high winds or stormy weather. In this photograph, the wave is coming into shore, and is about 4-6 feet tall. It wasn’t raining, but the winds were very strong. It is good to watch the surf, before going onto the beach, to see where the high-water mark is at. Even with this information, the wind can send waves higher on the beach. On the ocean, these are called sneaker-waves. They can pull people into the water, and can be deadly. It is important to be prepared for the environment and weather.

copyright Karen UlvestadIt is important to wear the appropriate clothing for adventures during the winter. Hypothermia can affect those who are not prepared for rain, wind, snow and colder temperatures. It is good to dress in layers, with a good water-repellent shell over the top. The wind will drop the temperature (wind-chill factor), and the cold can hurt exposed areas of skin (hands, fingers and faces). It is important to wear footwear that will keep feet warm and dry. This type of equipment can be found at outdoors stores, such as ski shops or REI.

Camera batteries will lose their charge faster in the colder weather. It is good to bring an extra battery, and keep it in a warm place (pocket near body heat). Most camera equipment is water-resistant, but it depends on the manufacturer and model of the equipment. It is good to keep the gear dry with a good camera bag (water-proof), covering for the camera/lenses and a quick-dry cloth to dry any water that does get onto the equipment.

The photograph below illustrates being prepared for the weather. More later. . .

copyright Karen UlvestadHappy Shooting. . .Karen
Creating a Sense of Depth in a Photograph

Landscape or cityscape photography depends on a sense of depth in the photograph.  The idea is to show the details in the landscape, while telling a story about the place.  Composition goes “hand-in-hand” with exposure of wild places, or structured cityscapes.  This type of photography usually has a fore-ground, mid-ground and background, which leads the viewer through the image.

In this first photograph, the fore-ground is the water.  The mid-ground is the small spit of land on the left and what looks like ice on the water.  The background is the mountain covered in snow.  With the Aperture set at F11, the Depth of Field (DOF) starts in the mid-ground, and continues through the background.  The inclusion of the fore-ground and mid-ground gives the viewer information about the location of the photograph.  It contributes to the “story” of the place.

copyright Karen Ulvestad
Exposure for this photograph is 100 ISO, 1/100 sec at F11. It was shot with my 100-400mm lens at 400mm.

This second photograph was taken in a Filbert orchard in Oregon.  I used the lines of the trees to create the feeling of depth.  Using natural or man-made lines adds to the DOF in the image.  The aperture for this photograph is F10, and the tree at the end of the row gives a sense of distance.  In this one, I used complimentary colors (red and green) to add to the composition.  This was taken in the early spring, before the leaves had come out on the trees.

copyright Karen Ulvestad
The exposure for this photograph is 100 ISO, 1/40 sec and F10. It was shot with my 100-400mm lens at 100mm.

This last photograph is taken with a wide-angle lens.  I shoot with a full-frame sensor camera, which makes 17mm a wide-angle lens.  For those shooting with a cropped sensor in their cameras, wide-angle lens size starts at 14mm.  I used the fore-ground (rocks) to five a focus point for the photograph, and the ferry docks add a nice line.  The lights from the dock spill out across the water, and create nice lines to counter the horizon line.  In addition, I shot this one with the lit ferry boat coming into the docks.  This was taken about 20 minutes after sunset.

copyright Karen Ulvestad
The exposure for this photograph is 400 ISO, .4 sec at F7.1. It was shot with my 17-40mm lens at 17mm

More Later & Happy Shooting. . .Karen

Telling a Story within a Photograph

It’s relatively easy to set a camera on Auto, go to a great location, and start shooting pictures.  Becoming a photographer (serious amateur or professional) starts when there is an understanding of light, exposure, and composition.  It happens when the camera is taken off Auto, and we start changing the ISO, Shutter Speed and Aperture.  We start creating the images from our own experiences, instead of letting the camera’s programing make the choices for us.

To tell a story with our photographs means to control these aspects of the process.  It asks questions like:  “how much of the photo do I want in focus?” or “do I want the birds wings soft or tack-sharp?” or “do I want the picture to look grainy or flawless?”

All of these techniques have different exposures to work with.  This combined with the elements included in the frame.  The photo below is a Northern Harrier (hawk) soaring.  I chose to include the snow-covered mountains at the bottom of the frame, to show some of the environment.  The image is cropped in height, to bring focus to the Northern Harrier and the mountain.

copyright Karen UlvestadThis next image is of two Brant in flight, a relative to Canadian Geese.  They migrate south during the winter, and nest above the Arctic Circle.  This is a winter shot, and the Olympic Mountains are in the background.  The background is soft in this image, because I chose a slower shutter speed (1/250 sec), and panned with the birds.  They fly very fast.

Again, I cropped this one in height to draw attention to the birds and their environment.  By panning, I blurred any man-made structure on the other side of the water.  There are houses there, and they have blended into the surrounding trees.

copyright Karen UlvestadThis last image is taken with a larger Aperture.  I wanted to show the streams path, waves, and the birds.  These are Bonaparte’s Gulls, Mew Gulls and Glaucous-winged gulls.  The lines from the stream start in the fore-ground, and lead the eye towards the birds.  The waves in the background add a “back” to the photograph.

I cropped this in height to show the birds.  This is a story about slack-tide on Puget Sound.  It is the time the birds gather on the beach, bathe, and drink fresh water.

copyright Karen UlvestadI teach these skills and more in my workshops.  Happy Shooting. . .Karen

How do you do “That”. . .

copyright Karen Ulvestad
This was taken in 1995 on slide film, and scanned to a digital file.

I’ve been a photographer for years, and started with film.  I wanted to be like Art Wolfe.  I had seen his photos in National Geographic, and wanted to work for them.  I decided to become one of the best photographers in the world, and that would be my life.  I would travel the world, take photographs, and people would pay me a lot of money.  I was 13 years old at the time.

Through the years, I have been blessed with the teachings of many different photographers.  I attended a workshop taught by Frans Lanting in the 1990s, and he told us that nobody in the room would make it as a professional nature photographer, except for the 1 or 2 that did not listen to him.  I love a challenge!

Bryan F Peterson’s workshops brought in the idea that creativity and light were the foundation for all successful photographs.  I’ve taken several workshops from him through the years, and have “wow-ed” him with a few photographs.  This photo of the Painted Desert was the first “wow”, and it was at a workshop.  It was followed by silence, in a room full of 50+ people.  It is one of my fondest memories about photography.

The other factor that brought me to this point in my career was being recognized as a talented photographer by a local photographer.  He taught introduction photography classes, and asked me to assist him.  This was in 1995, and lasted for two years.  He also encouraged me and others to show our work, by organizing a gallery in LaConner, WA.  I was covering a shift at the gallery one weekend, and had the opportunity to listen to a gentleman critique all my work to a friend without even acknowledging my presence in the gallery.  Listening to others can give insight, and knowledge about the artist’s audience.


Copyright Karen Ulvestad
This was taken in 1997 on slide film, and scanned to a digital file.

So now when I do a show or talk, people ask me “how do you do that?”  I could be anything, such as how did you get the background to go dark.  How did you get the picture so colorful?  What kind of camera do you use?

Well, a good photograph doesn’t have much to do with owning an expensive camera.  It does have a lot to do with knowing how to use the equipment that you own or can afford to own (Point and Shoot or DSLR).  It comes down to understanding light, exposure, composition, and how to manipulate the camera to get the artist vision.  It takes practice, using all this knowledge to hone a photographer’s skills.

I teach student’s these skills through several venues.  On the weekends, I teach through Nature’s Photo Adventures.  The 2 hour workshop is called a Photo Walk.  This format allows students to learn these skills, practice the skills, and ask questions regarding application of the skills.  Many of the Photo Walks happen at the zoo, where there are an abundance of photo opportunities.  For the more advanced students, I offer a 1 day workshop (4 hours) of classroom time, and opportunity to practice skills.  The format of the classes focus on skills, and students being successful with their photographs.

For those who prefer a classroom setting, I teach a series of Digital photography classes through the City of Edmonds.  There are 4 individual classes that are 2 hours of instruction.  Each one builds off of the knowledge learned in the previous class.  Students can sign-up for these individually.  The first class starts with basic camera operation.  Class two focuses on exposure and light.  Class three works on composition, and the application of exposure/light.  Class four finishes with the digital darkroom, and what software programs work best for their costs.

I teach longer workshops through the Pacific Northwest Art School on Whidbey Island.  In 2013, I will be teaching a one-day (6 hour) workshop called “From Camera Knowledge to the Digital Darkroom Intensive.”  This will be one day focused on basic camera operation, exposure, composition, light, practice shooting, and finishes with the Digital Darkroom.  This will be on Saturday, March 23, 2013.

The second workshop I will be teaching here is “An Island Photographic Adventure – Birds, Wildlife & the Environment.”  It will be a 2 day workshop with classroom time, and shooting on location.  The shoot locations will be on Whidbey and Fidelgo Islands.  The workshop will be held Saturday and Sunday, July 27-28, 2013.

My other teaching venue is the Sitka Center for Arts & Ecology on the Oregon coast.  I will be teaching “Of the Land, Sea & Air – An Oregon Coast Photo Adventure.”  It will be in June, though I do not have the final date yet.

So, when asking a photographer, “how did you do that,” consider taking a photography workshop. . .

copyright Karen Ulvestad
This was taken in 1992 (I think) on print file, and scanned to a digital file.

Photographing Fall Colors. . .

One of my favorite times of the year for photography is coming up.  In the fall, the leaves on the trees turn vibrant yellows, oranges, reds and sometimes purple.  Each region has its own timing for the fall foliage.  Ours is anytime between late September to mid-November.  It all depends on the amount of rain, and when the first frost happens.

The shot below was taken on Whatcom Creek in northern Washington state.  This is a long exposure (3 seconds) on a tripod.  The depth of field (Aperture) is f22, for maximum sharpness throughout the photograph.  The ISO was 100.

The day was over-cast, hence the lack of dark shadows and bright highlights.  This can work two ways for a photograph.  First, it give even lighting, since the clouds diffuse the sunlight.  Second, too much sky showing becomes un-interesting, and can take away from the photograph.  In this photo, I cropped out the sky, and focused on the creek, fall foliage and surrounding landscape.

copyright Karen Ulvestad

This next example deviates from a traditional landscape photograph.  The trees, leaves and stream become an abstract image.  This effect is created in the camera by “zooming” the lens.  In this case, I used my 17-40mm lens.  In this case, I started at 17mm and zoomed to 40mm.

This is a 1 second exposure at f10.  The ISO was 100.

copyright Karen Ulvestad

This last photograph was taken on a sunny day.  I chose a shaded bend in the river, and cropped out the brightly lit background forest from the frame (in camera).  Composition can intensify the fall leaves, by surrounding the tree with a single color.  In this case, it is the other green trees that have not turned color yet.  I set my camera’s White Balance on Cloudy, which “warms” up the colors in the photograph.  A polarizing filter is handy to cut the “glare” from the top of the leaves.

This was shot with my 100-400mm lens, at 100mm.  The exposure was 1/60 sec, f4.5 and ISO 100.

For more information about locations, visit my Examiner.com articles, and subscribe to my updates.

Happy shooting. . .Karen

copyright Karen Ulvestad